Links / Accessories
Accessories
For many photographers, this is where the cost of trial-and-error stings the bank balance and clutters up storage space. How many camera bags do you have? It’s great to find the right gear at the right price, but so often we end up making multiple purchases to meet a simple need. Buy cheap, buy twice is an adage that’s often true, but there are still some bargains to be had. I’ve listed here the gear I use on a daily basis and all work well for me, notwithstanding any specific niggles.
Tripods can be almost as much of a pain to get right as camera bags. The trouble is, their effectiveness is both a technical consideration and a personal choice. Ultimately, there will be compromise involved. My SmallRig AP-10 carbon fibre travel tripod meets nearly all of my needs, at a relatively affordable price. I went for the shorter 52” (133cm) model as it’s more compact and lightweight than others in the range. It’s perfectly stable, with only 3 sections, compared to the more usual 4, meaning the final section is still of a sensible girth. Carbon fibre is both lightweight and, importantly, warm in the hands. The plastic release clips (I don’t like twisty ones), are again warmer than metal, and are less prone to seizing. Sure they might be easier to break, but they haven’t done so in nearly 2 years of abuse. When using my long lens at its full extent, I also use a nodal plate to better balance the setup. Not quite as tall as I’d ideally like but that’s what flip-up screens are for. Link: https://amzn.to/4q6FahC
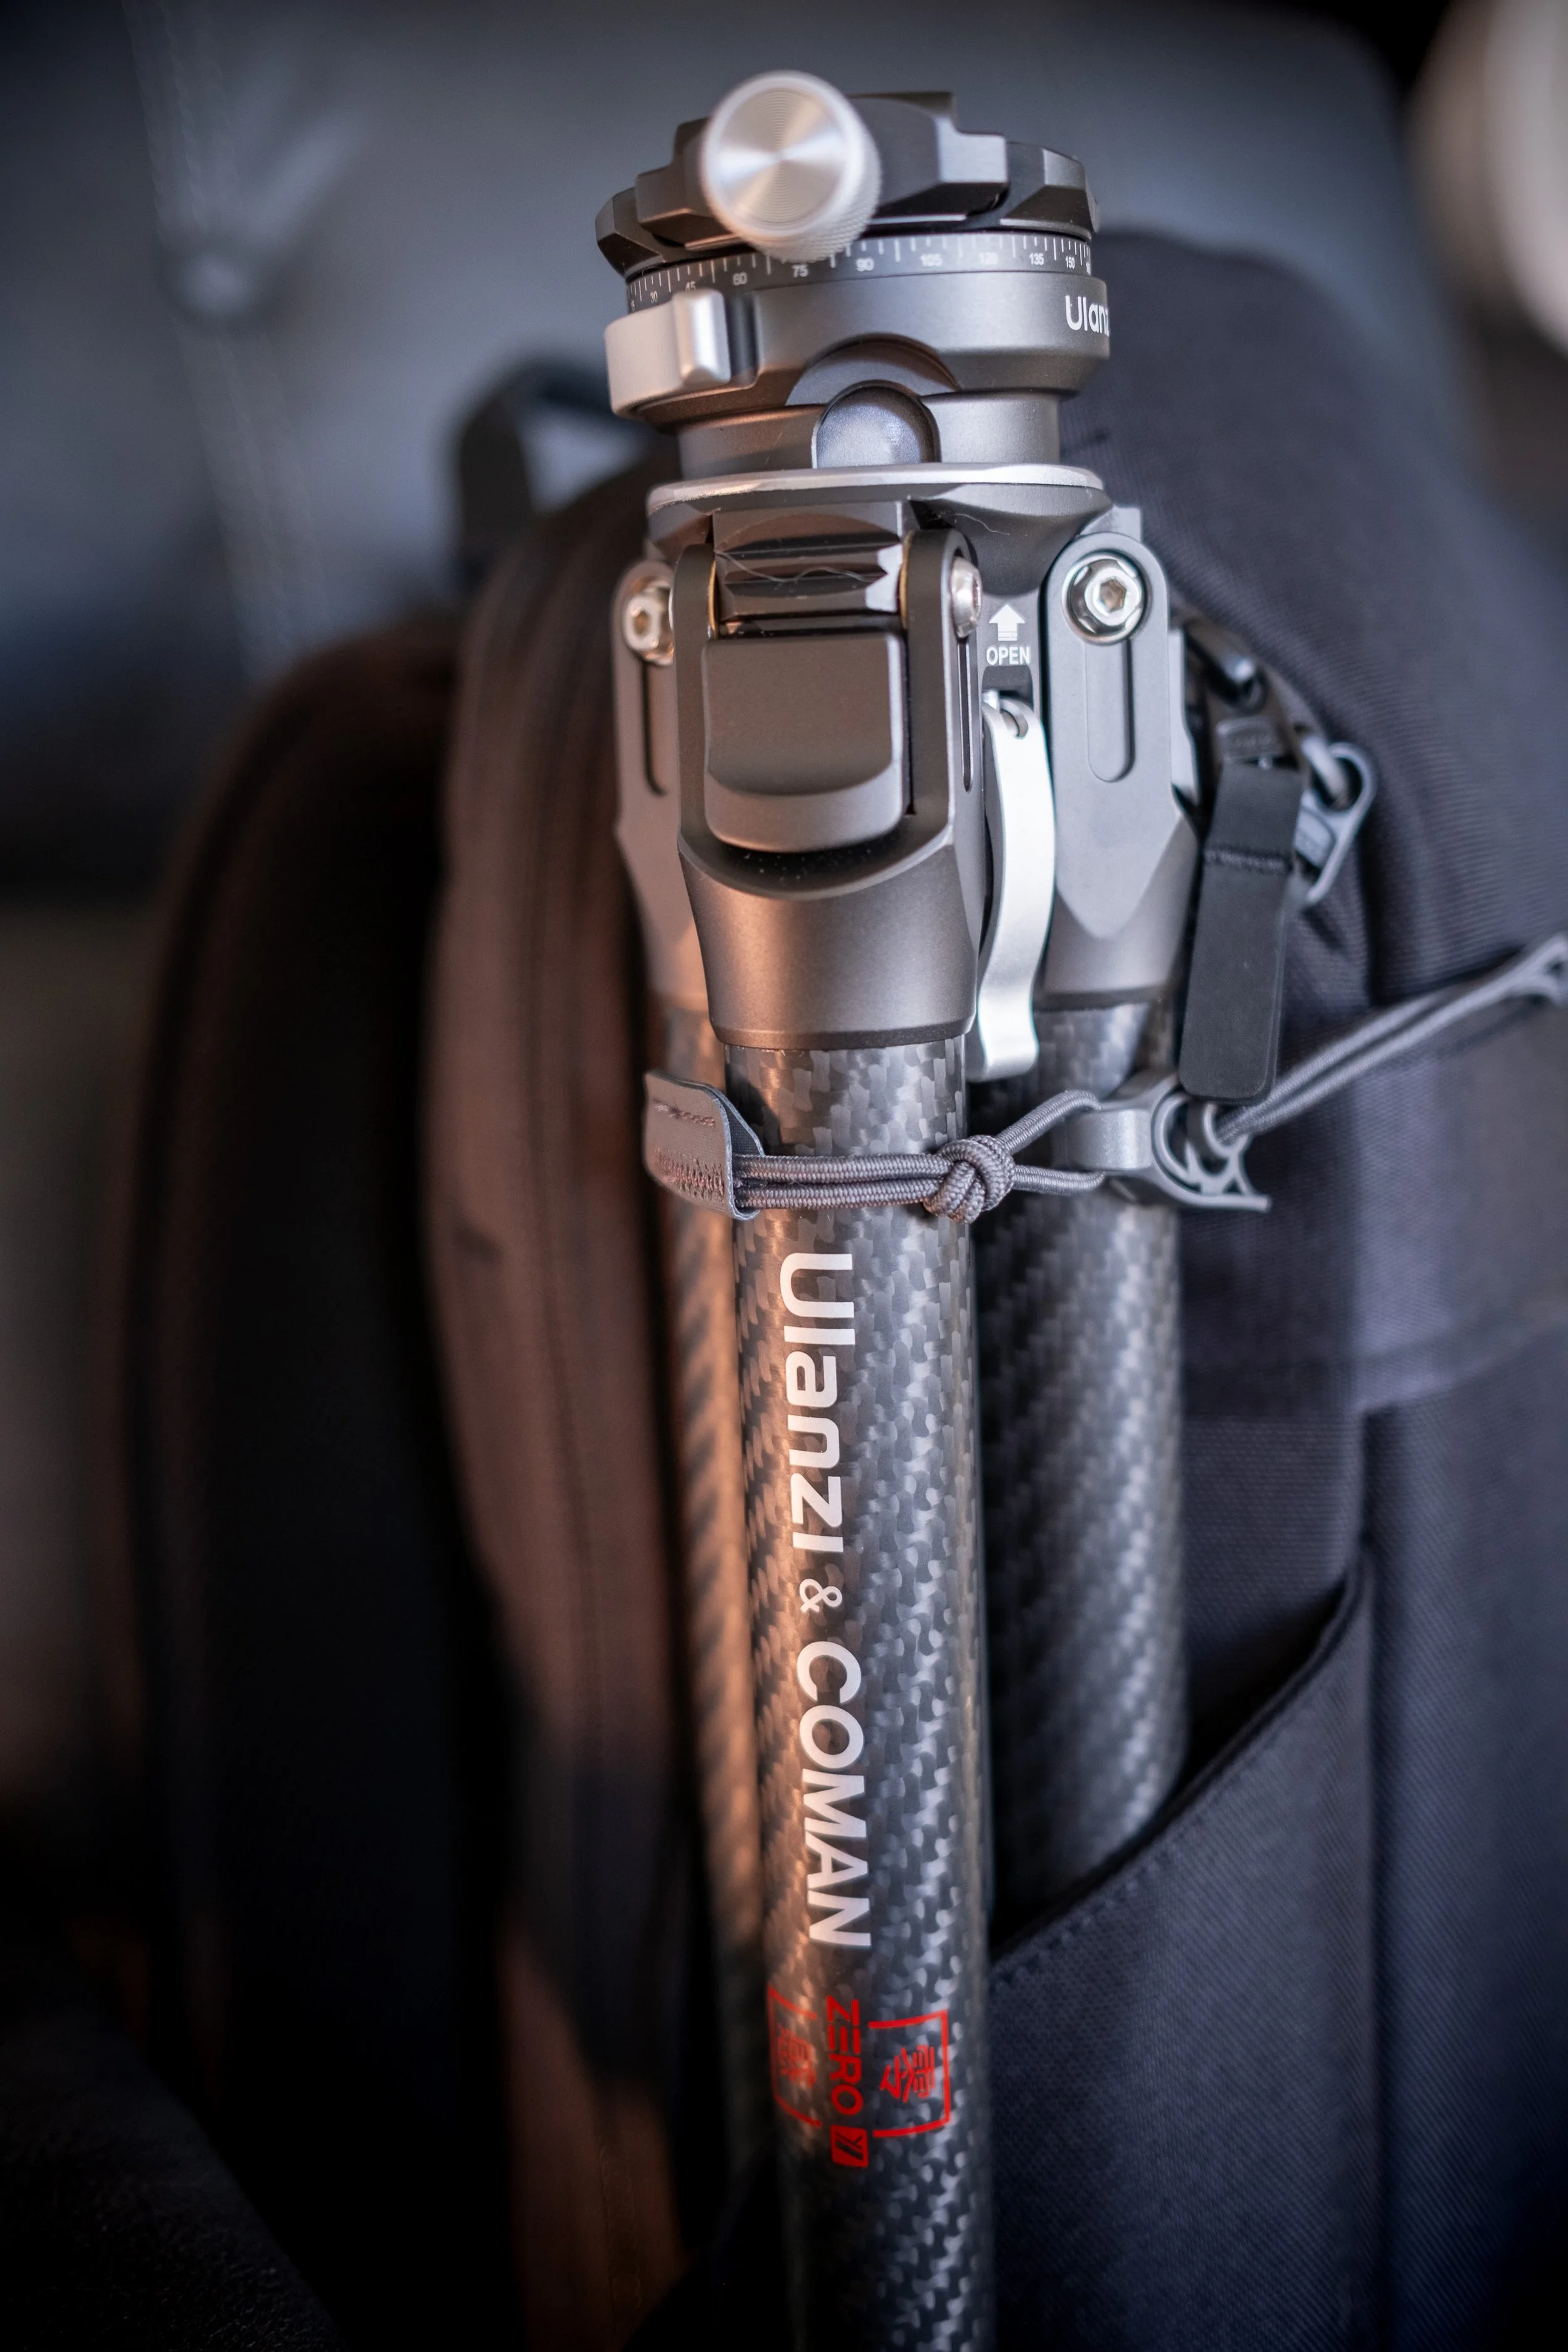
Tripod update (March 2026): With a bit of a deal on offer, I opted to give Ulanzi and Coman another go, this time their Zero Y travel tripod - the F38 variants really are a no-go for me. This may not be a great choice for those with hefty full-frame setups but it copes surprisingly well with my Fuji kit. Even with the centre column extended and my biggest zoom lens poking out to its full 300mm, the tripod stays stable - none of the long lens droop from which the Smallrig suffers. Most of this I think is down to a chunkier ball-head and more robust locking mechanism. I’m not quite convinced about longevity yet; overall it feels a little more fragile than the AP-10 - all the clamps rattle, along with the integrated hook/allen key. The legs end at quite thin final 4th section too, but somehow it all seems nicely stiff. I’ll continue with progress updates, but for now, I’m pretty impressed. Link: https://amzn.to/4s8RIXj
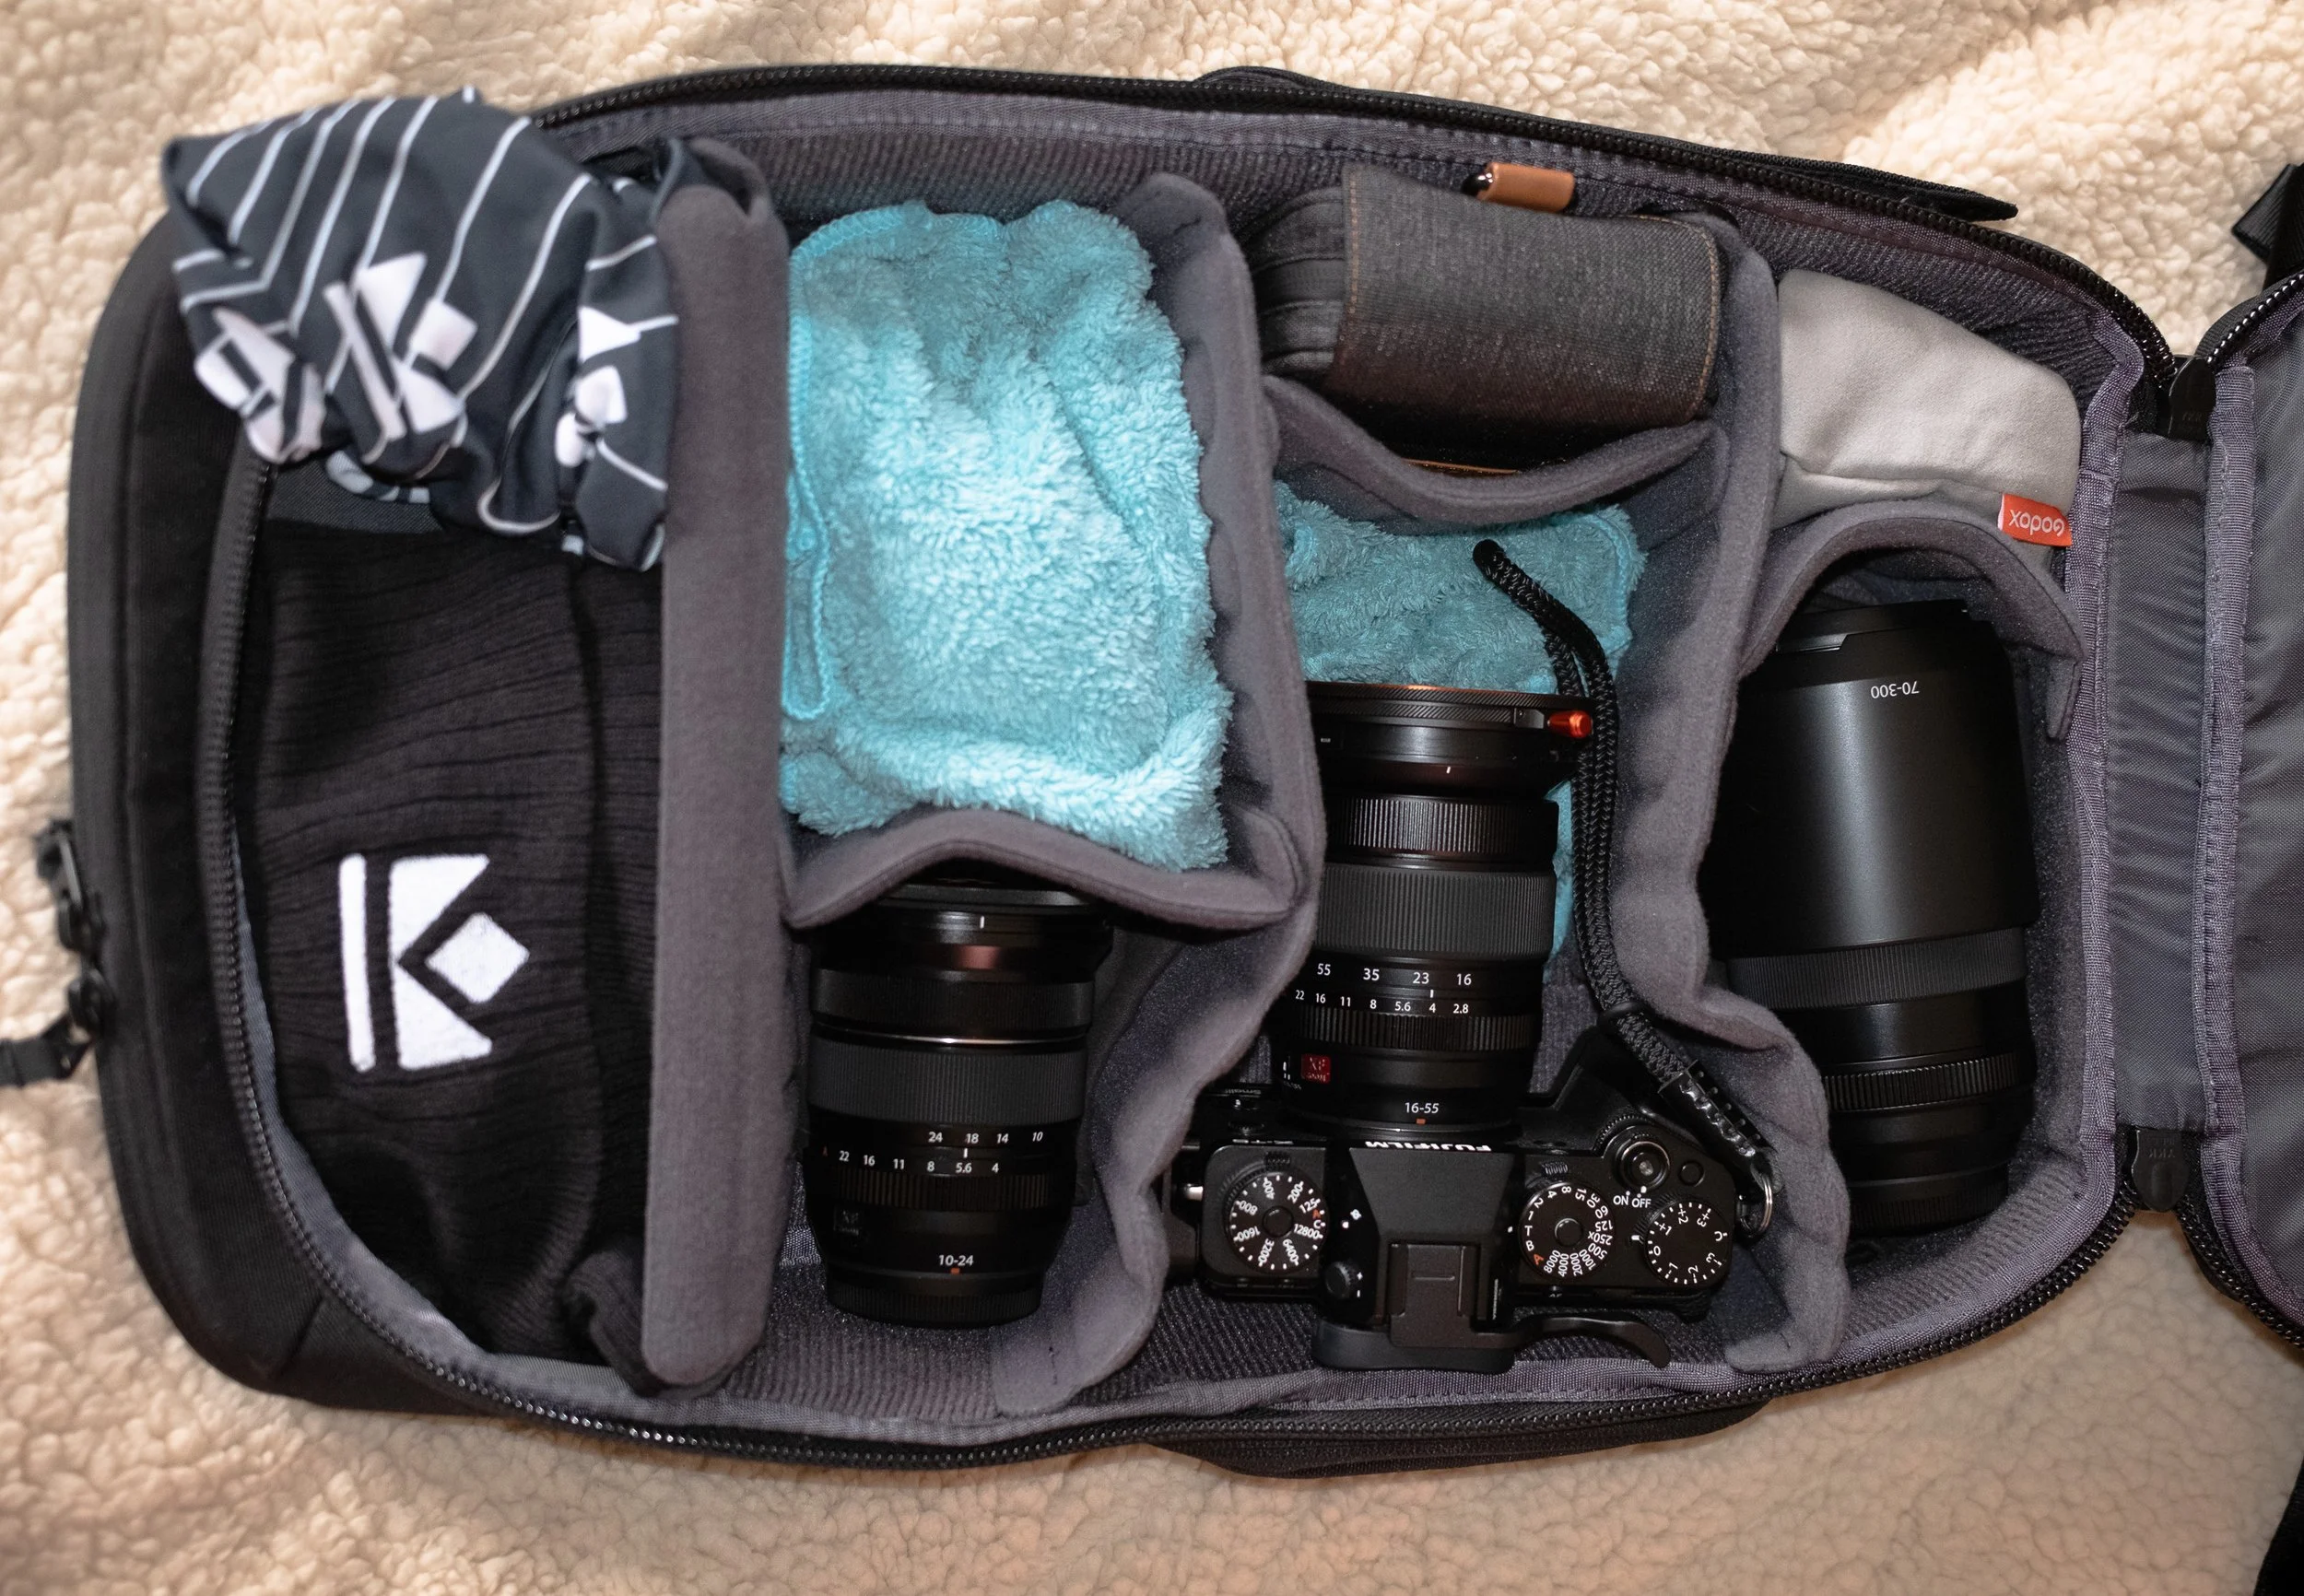
Camera bags can be more of a pain to get right than tripods. I have a loft full of deteriorating, failed camera bags. They’re either too bulky, too flimsy, or worst of all, impractical to use and carry. Like most of my gear, I tend towards the lighter bags. For several years, I used the underrated Manfrotto Compact 1 CSC Backpack (now discontinued), but I eventually got fed up with a ‘straps down - muddy back’ opening and treated myself to a Gomatic Luma 18l backpack. I resisted the hype around this for some time, but have to admit, that in black rather than the more city-oriented colour ways, it makes for a superb backpack. It takes both of my cameras, and all of my main lenses, with space for filters and tastefully branded(!) warm gear. It’s nice and compact, has a sternum strap, and I’m gradually getting used to the clamshell opening. I had to fit some brightly coloured zip tags for the main compartment so that I could easily find it amid the mass of grey zip tags for the other sections. Link: https://amzn.to/4brtSAW
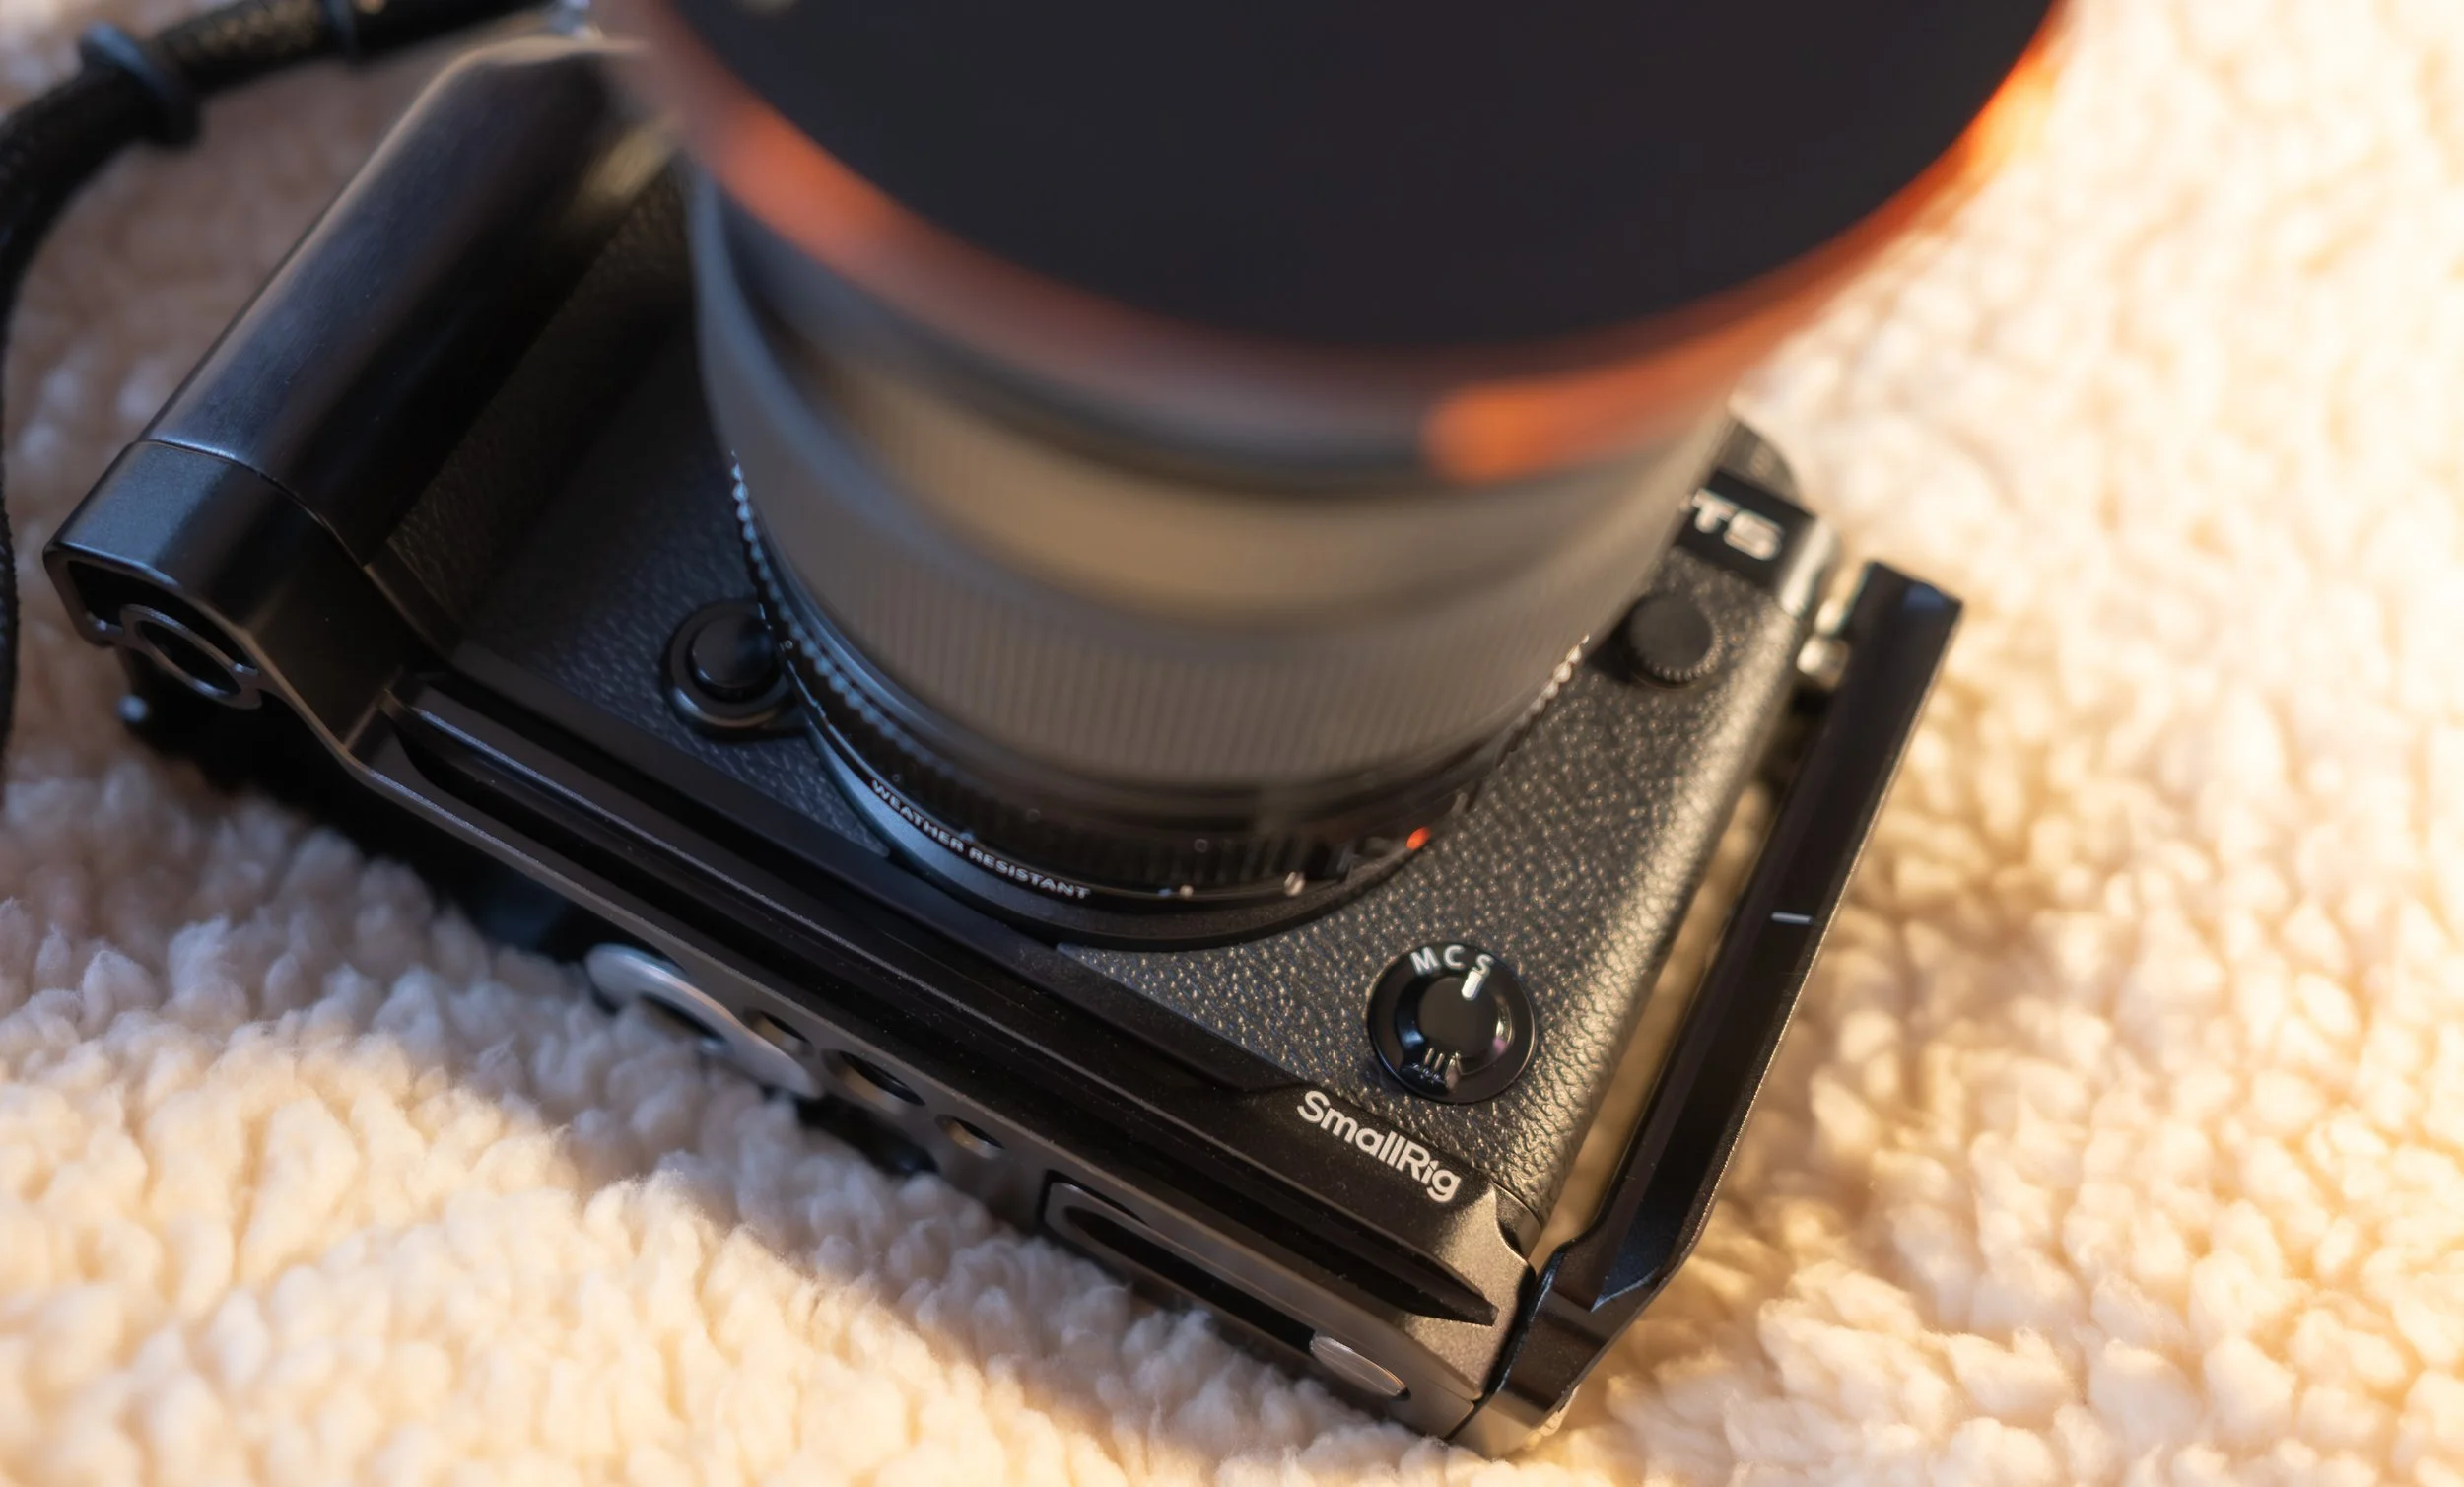
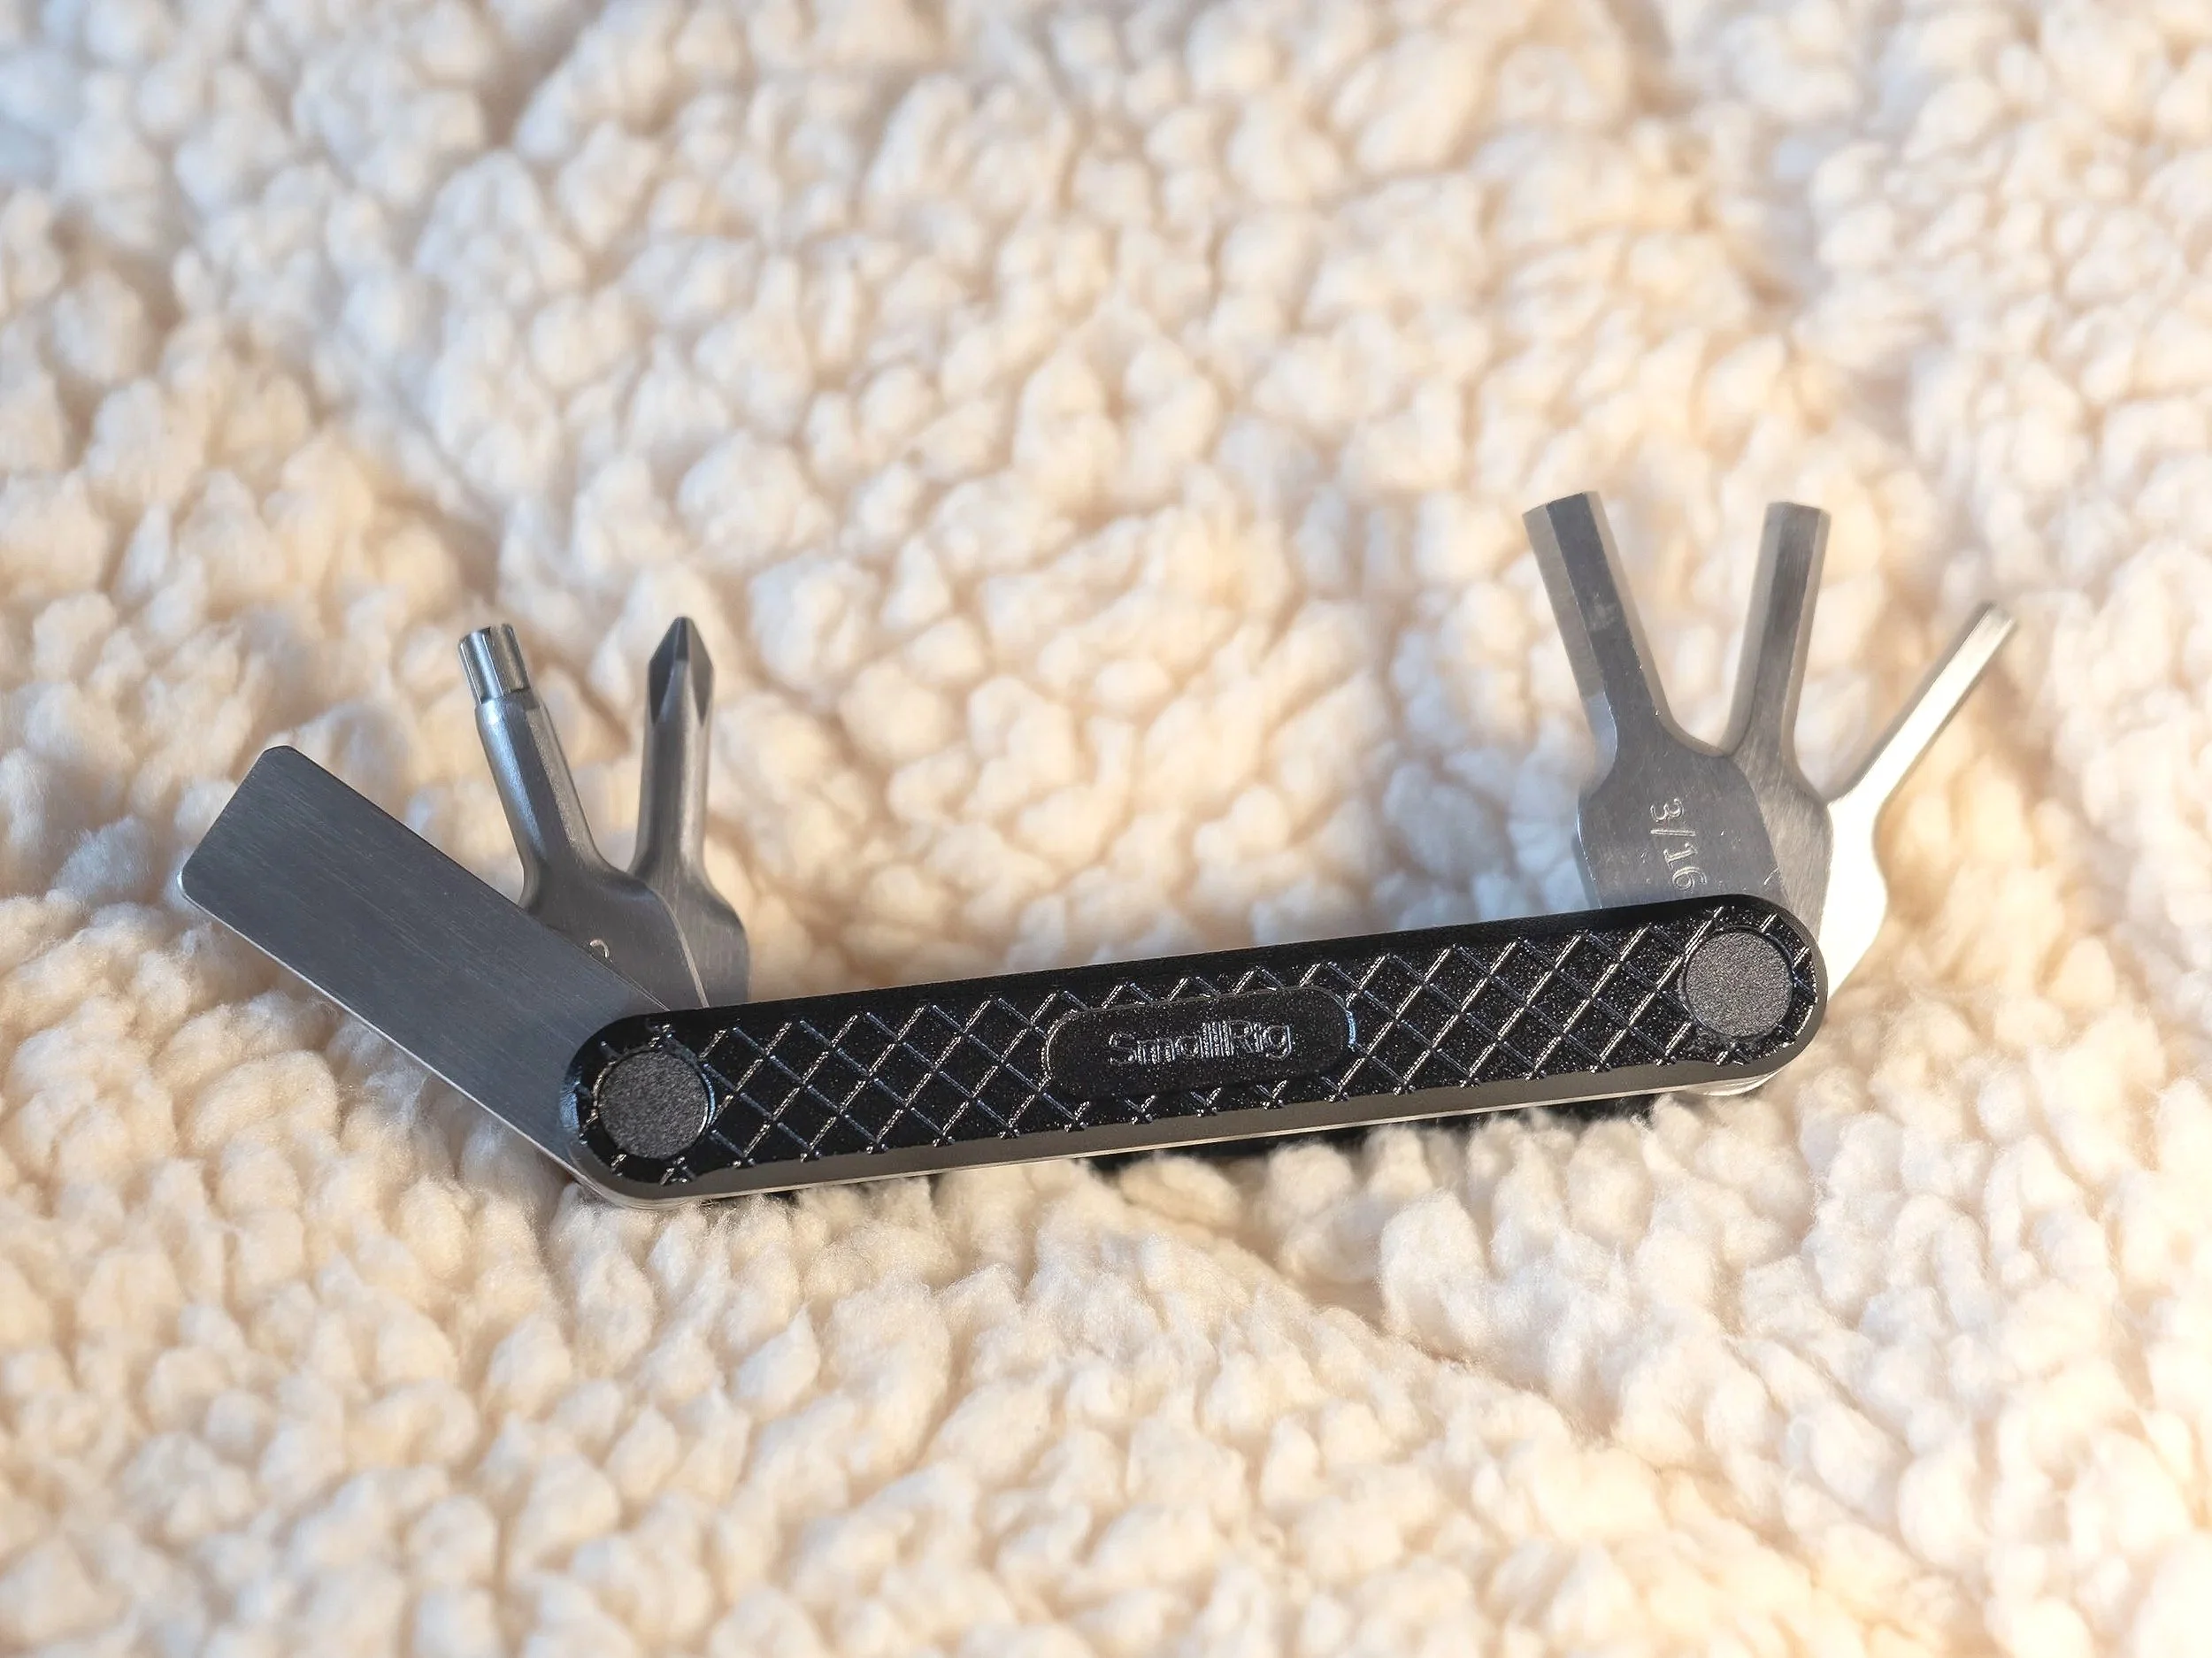
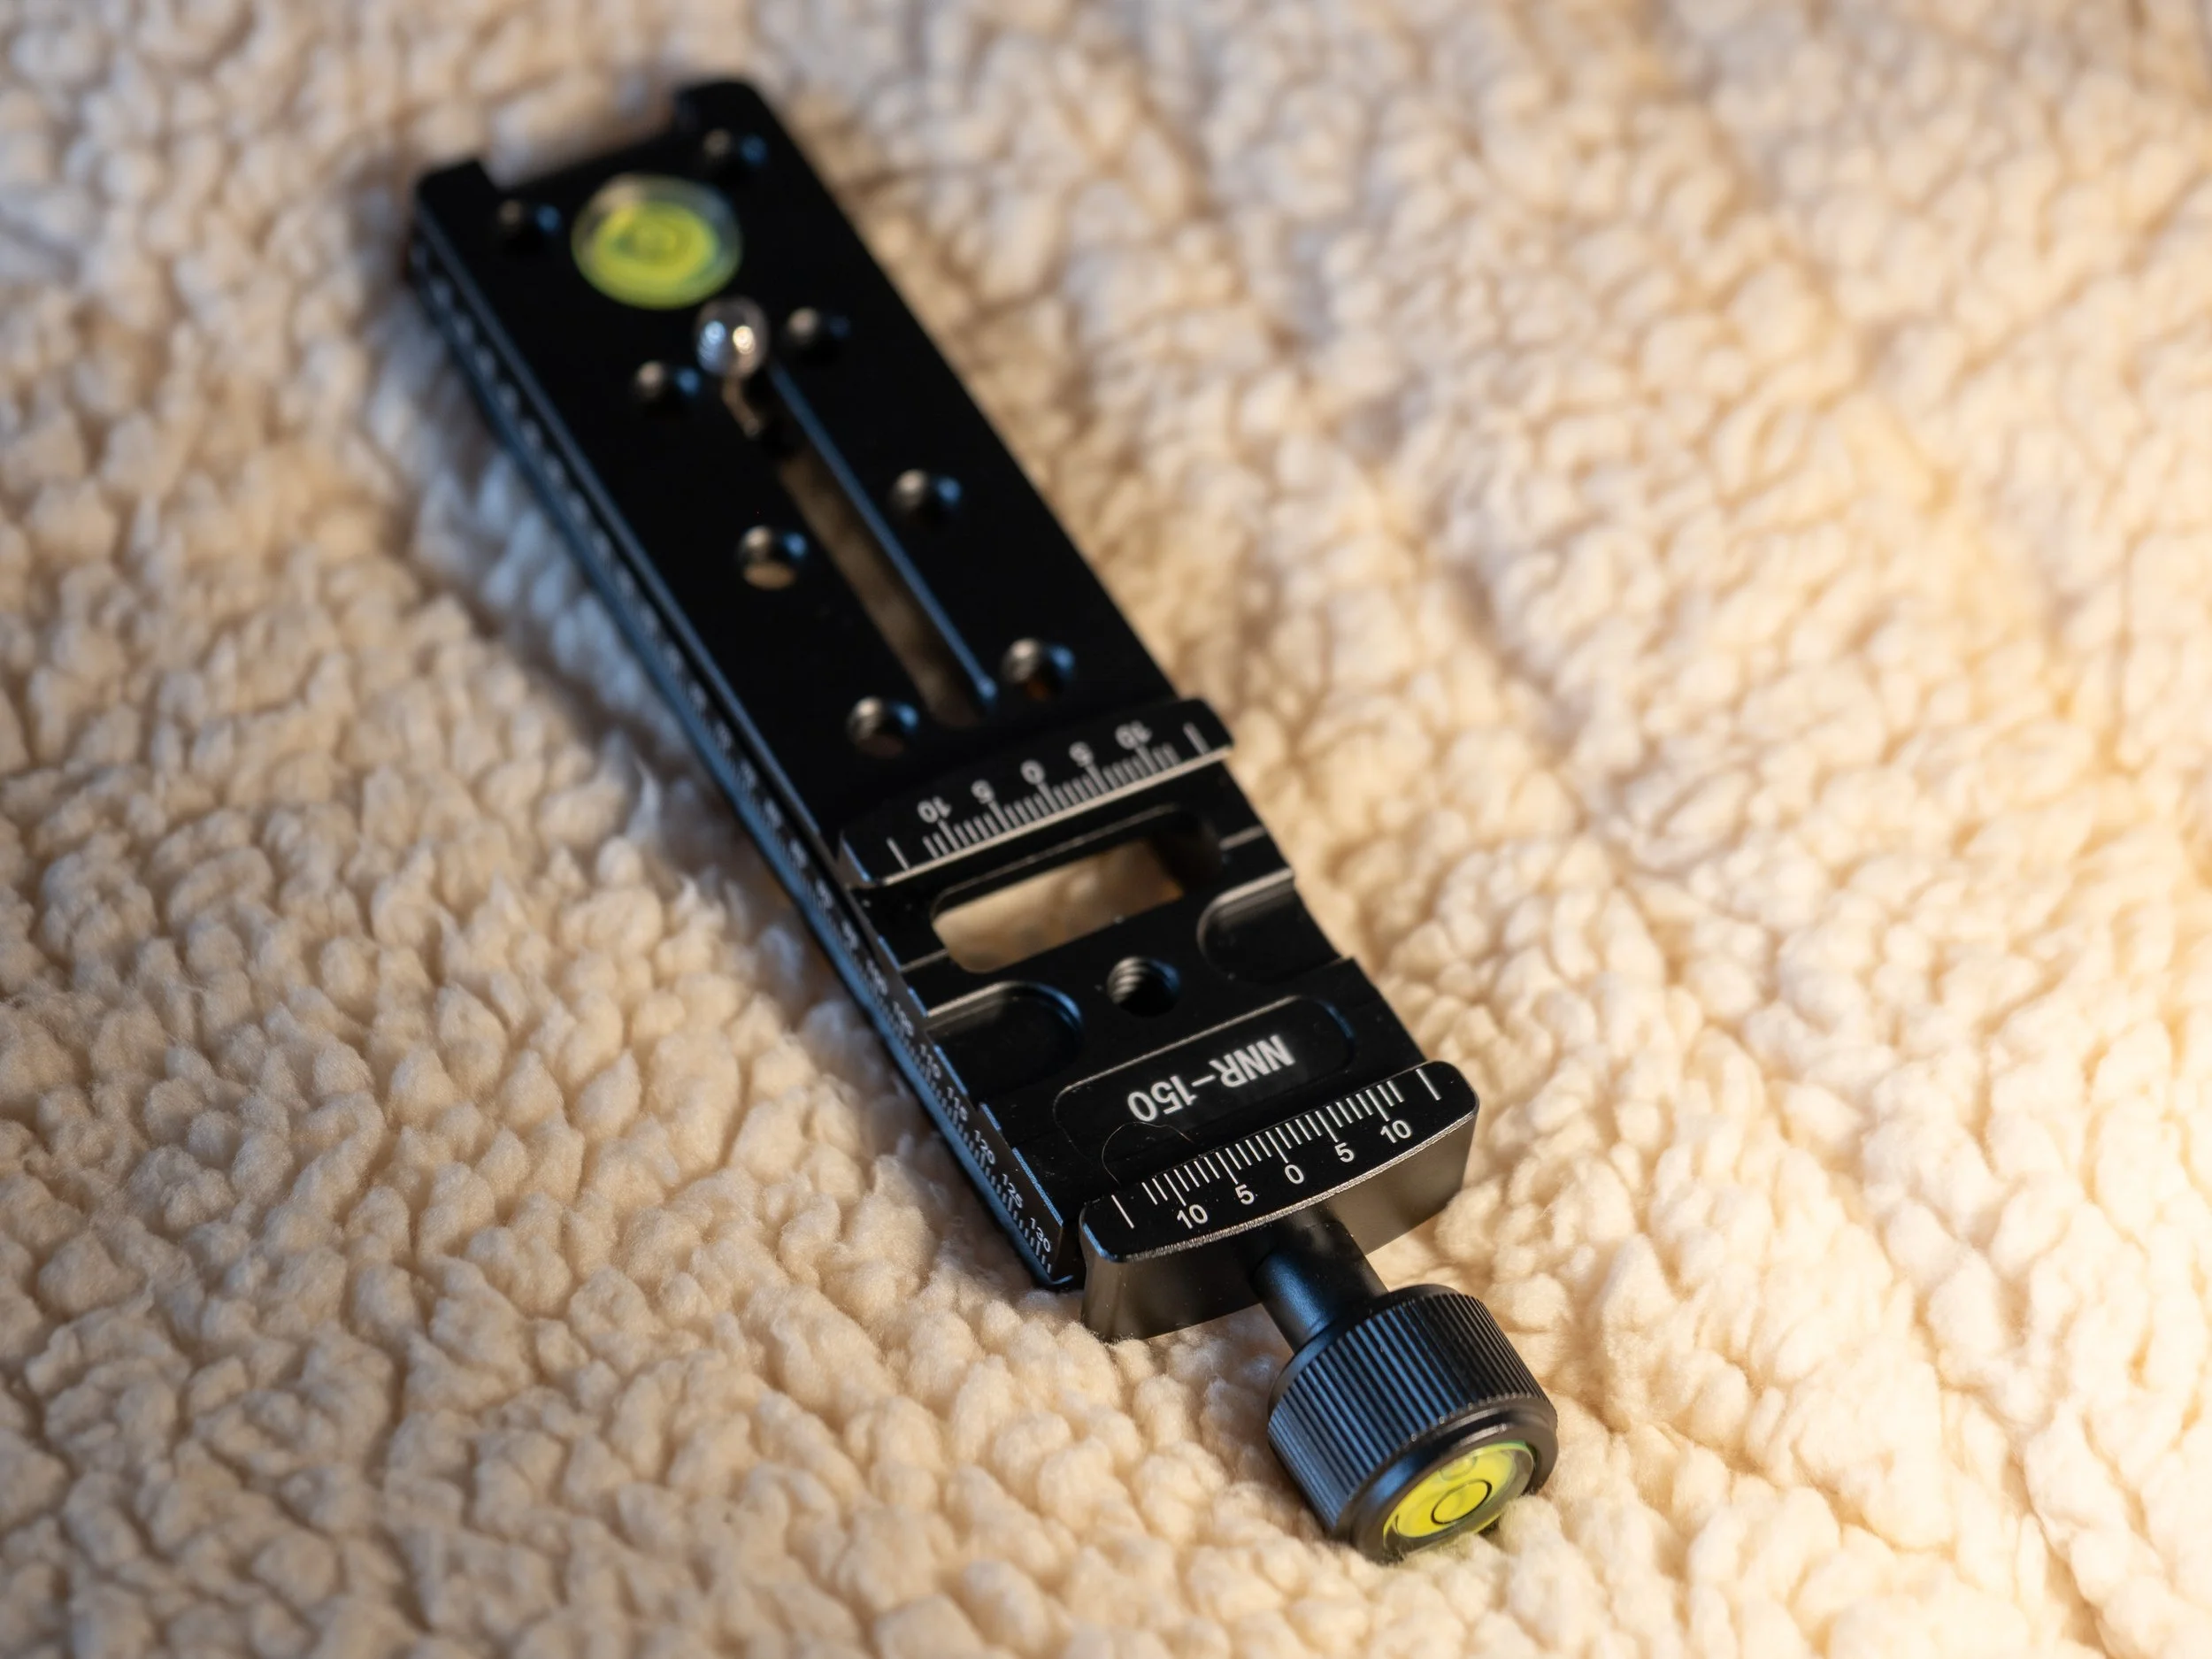
Having spent an inordinate amount of time and money finding a compact camera, I then go and surround it with scaffolding… The right camera L-bracket can make all the difference in terms of mounting quickly and effectively to a tripod, adding a little extra grip and very little weight penalty. This SmallRig camera cage is by far the best mounting option I’ve used for my SmallRig tripod - hardly surprising. It weighs next to nothing, fits perfectly, and even has a magnetically attached mini-screwdriver tool to connect and disconnect it. The advantage of the L-section that runs up the side of the camera is that vertical shots can be taken with the camera still mounted optimally over the centre of the tripod, rather than hanging over the side of it. The very slight downside is that the side doors for the mic, electronic cable release, HDMI port, etc are tricky to open with clumsy fingers, until you realise that the wee supplied tool does just the job. Brilliant. Link: https://amzn.to/4kam0Gj
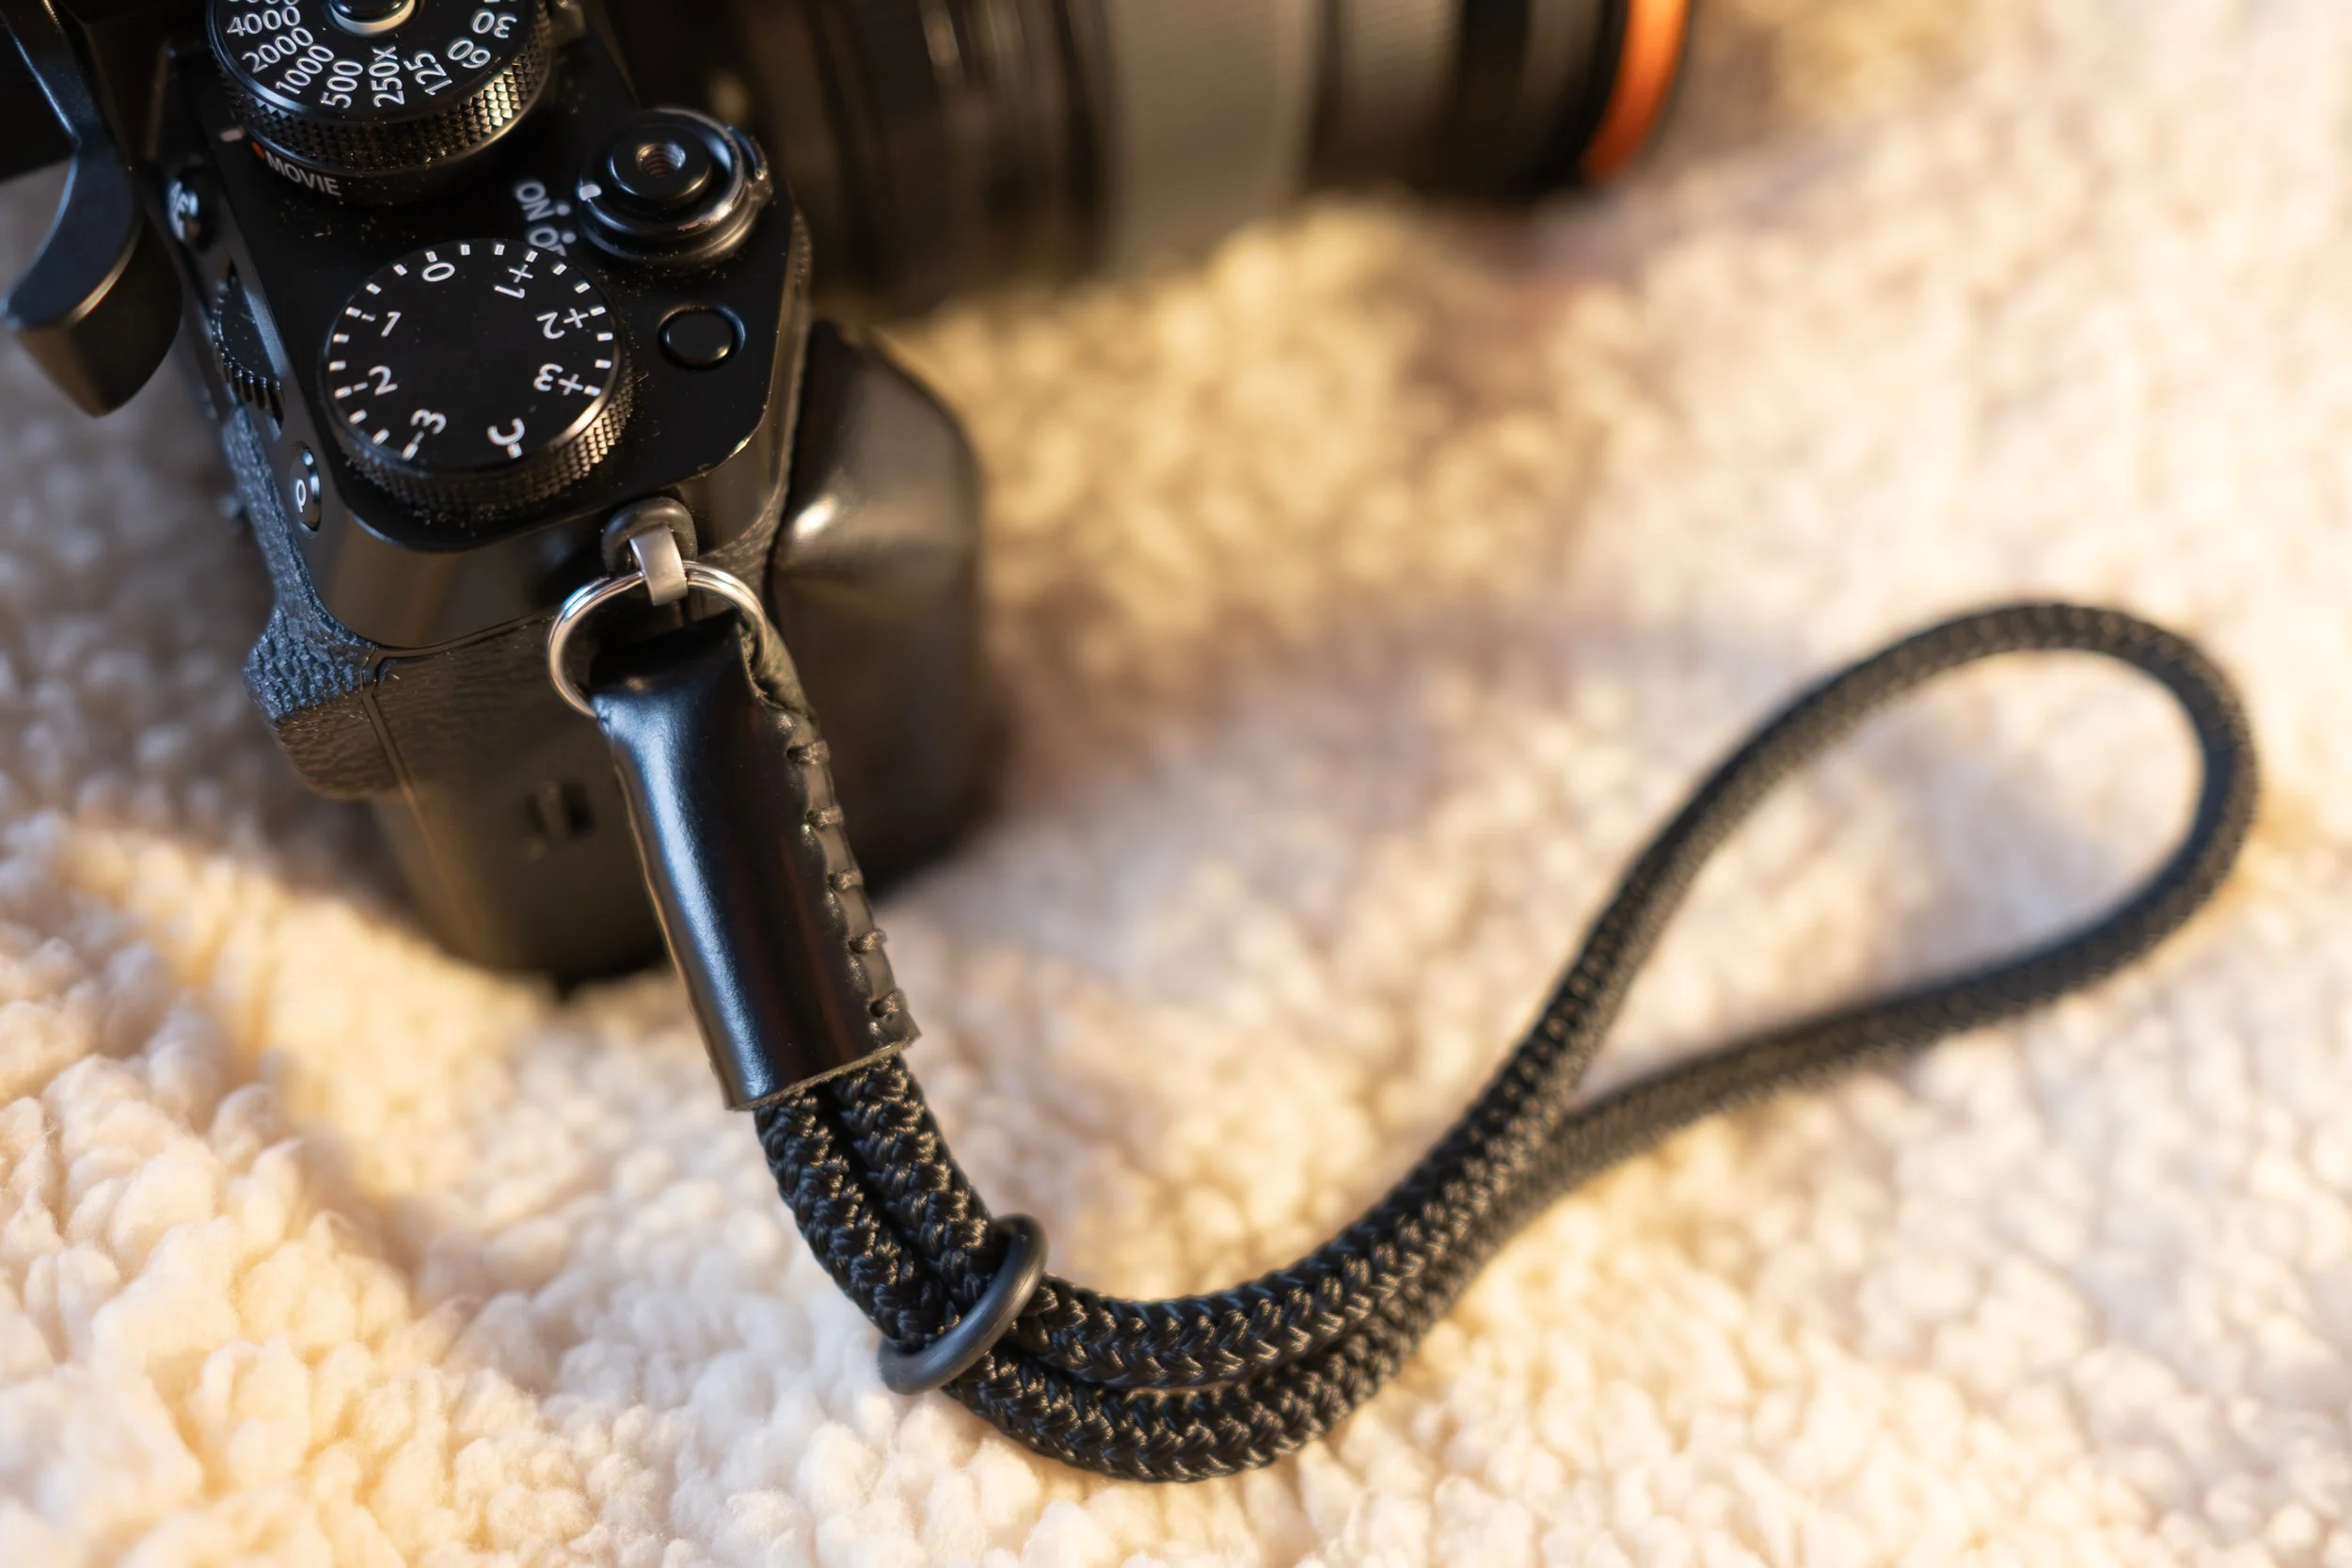
I try not to spend much on camera straps. I have tried Peak Design / Peak Design rip-off quick-release connectors but found they just add a load of plasticky bulk. I have a wrist strap on my X-T5 purely for safety. If it’s in the bag or on the tripod - which is most of the time - I don’t need a strap. If I am walking about holding my camera, I’m not dangling it around. It’s also too heavy to wear around my neck. I buy these straps from a maker on Etsy, and replace the leather protection flap with tiny rubber o-rings - they’re a challenge to fit, but protect the camera body very neatly. There are similar straps available on Amazon which seem to offer similar quality at an even lower price, but they may be a little bulkier. Link: https://amzn.to/4qGQj9Q
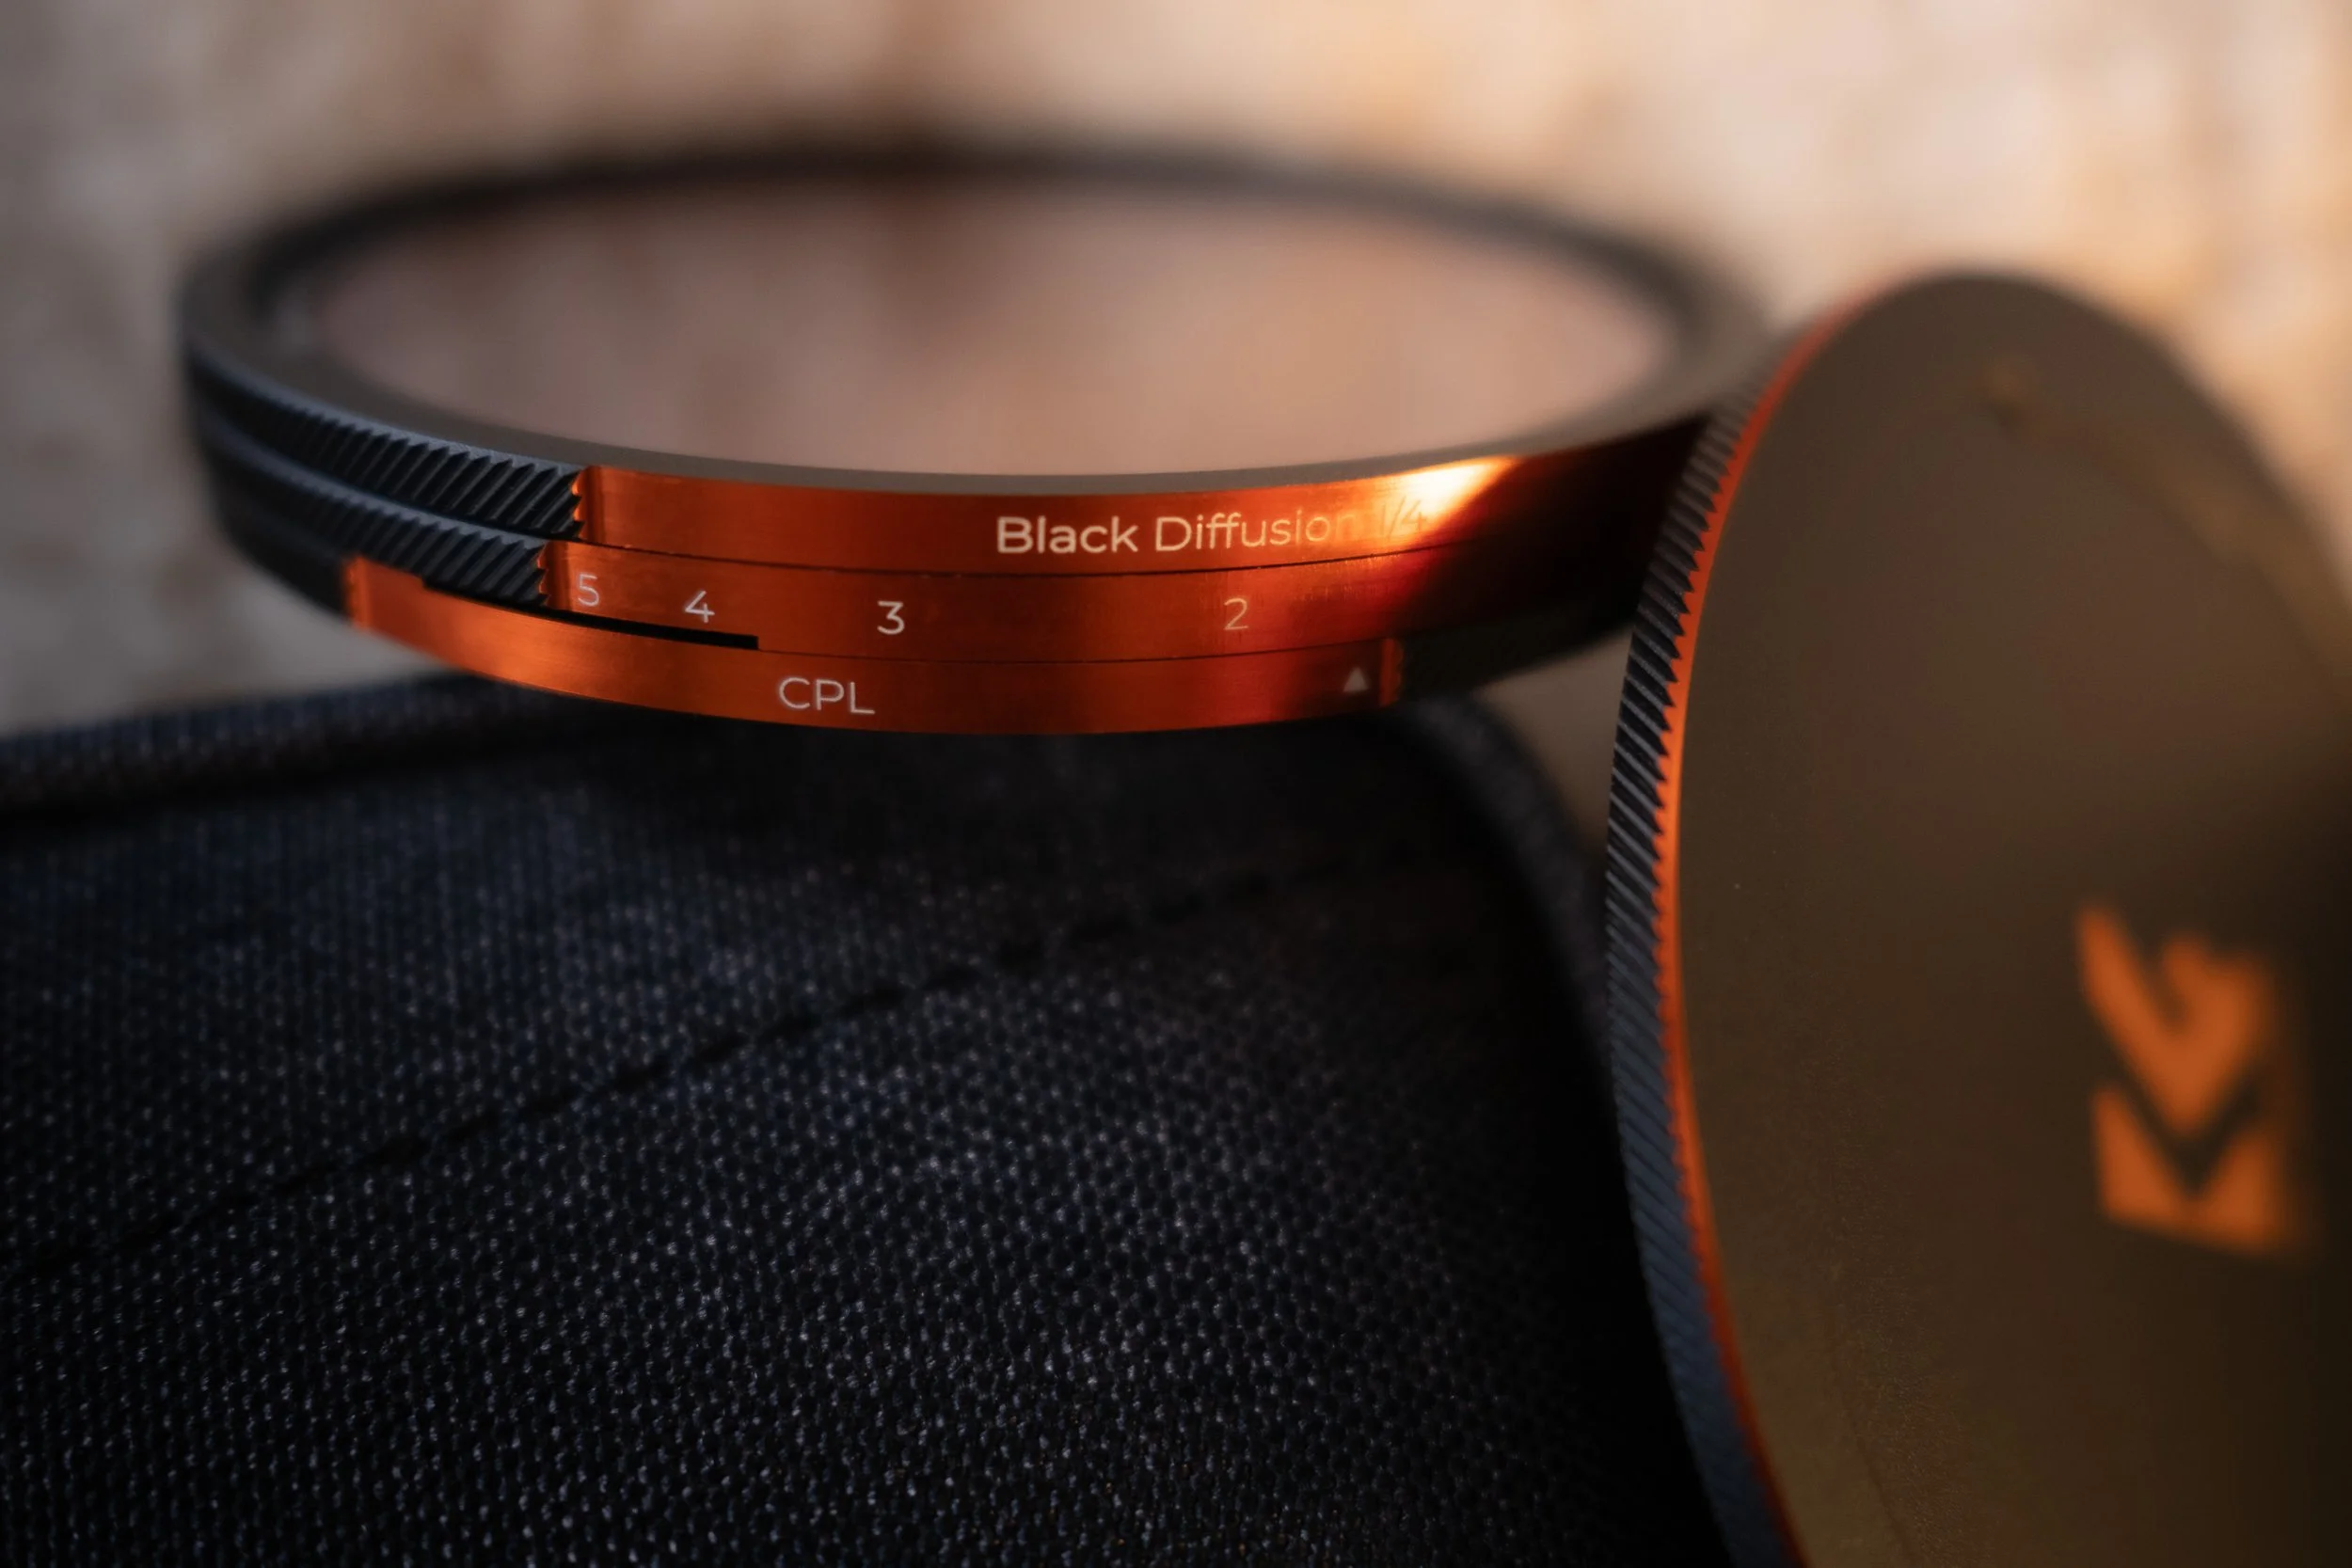
A decent filter kit is a must-have for landscape photography, but by decent, I mean that the filters absolutely must enhance your images; not change them in ways you don’t expect. I’ve tended to use the best I can find at a price I can afford. After a bad experience with a deformed filter mounting ring, which nearly ruined an expensive Canon lens, I’ve tended to favour magnetic filters. I frequently use a Circular Polarising filter (CPL) and various Neutral Density (ND) filters to allow for slower shutter speeds in bright light. For the past couple of years I’ve been using K&F Nano-K filters, but recently invested in a set of K&F magnetic Nano-X series, which includes a twisty ND filter and a Black Mist filter for dreamy light blooms (although I doubt I’ll use it). It’s certainly an impressive kit with, so far, decent results. The jury’s out a little on the wee pin that operates the polariser, and I need practice to stop me knocking the entire set off the lens. Link: https://amzn.to/4qPE9M1
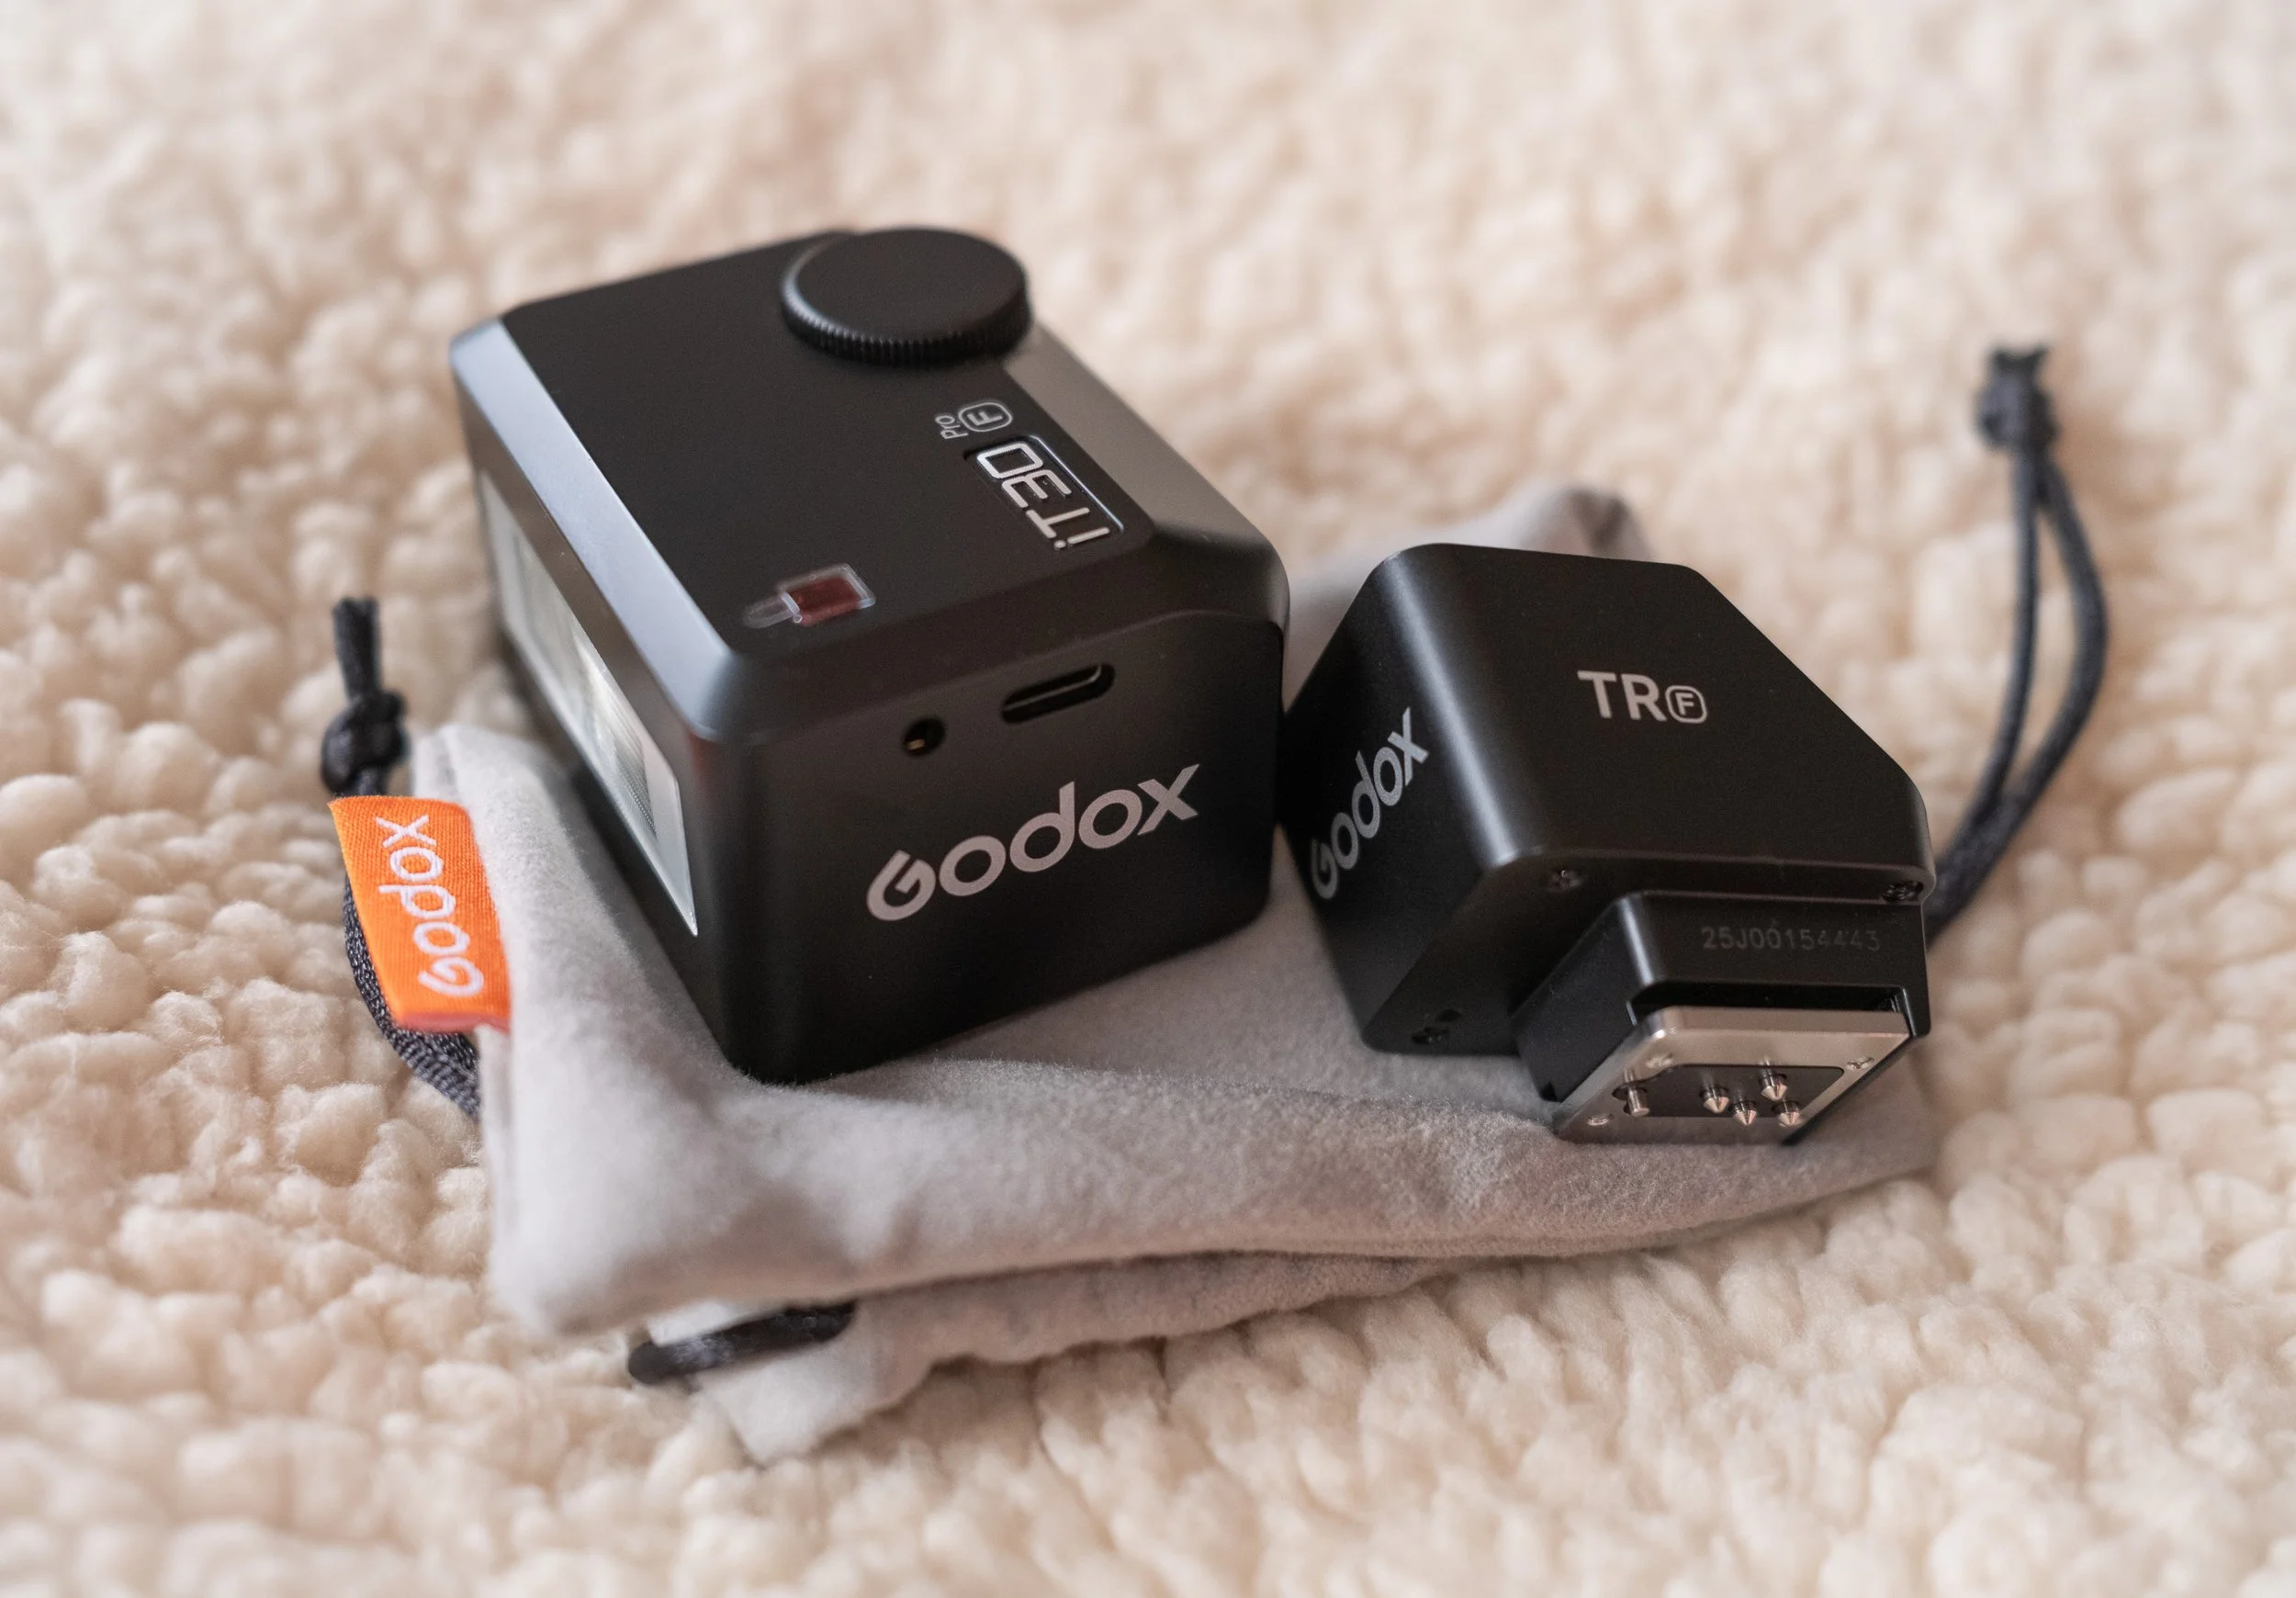
A flash certainly isn’t the first accessory to consider as a landscape photographer, but I feel somewhat unequipped without one. The built-in flash on my X100v has saved the day when shooting backlit subjects or the odd product shoot. This tiny IT30 Pro flash from Godox does a similar job for my X-T5. Through The Lens (TTL) flash control makes using it a doddle. It’s not the most powerful flash in the world, but it works well, has a USB-C rechargeable internal battery - no more hunting through camera bags for AA batteries, and has a little built-in, though not particularly effective, diffuser. It can even act as a receiver to be fired from a flash trigger (not yet purchased). For a bit more flexibility in terms of flash angle and to raise the flash to avoid lens shadows, I also have the wee flash riser, which is great value and a recommended addition. Link: https://amzn.to/4a68DSE
Small stuff
The only part of my X100V that isn’t weather sealed is the exposed, moving element of the lens. This is neatly solved with the addition of a Haoge screw-on UV filter. It hardly adds any bulk, doesn’t restrict the lens element from moving when focusing, and importantly, and has no impact on image quality. Link: https://amzn.to/4a6Ehzw
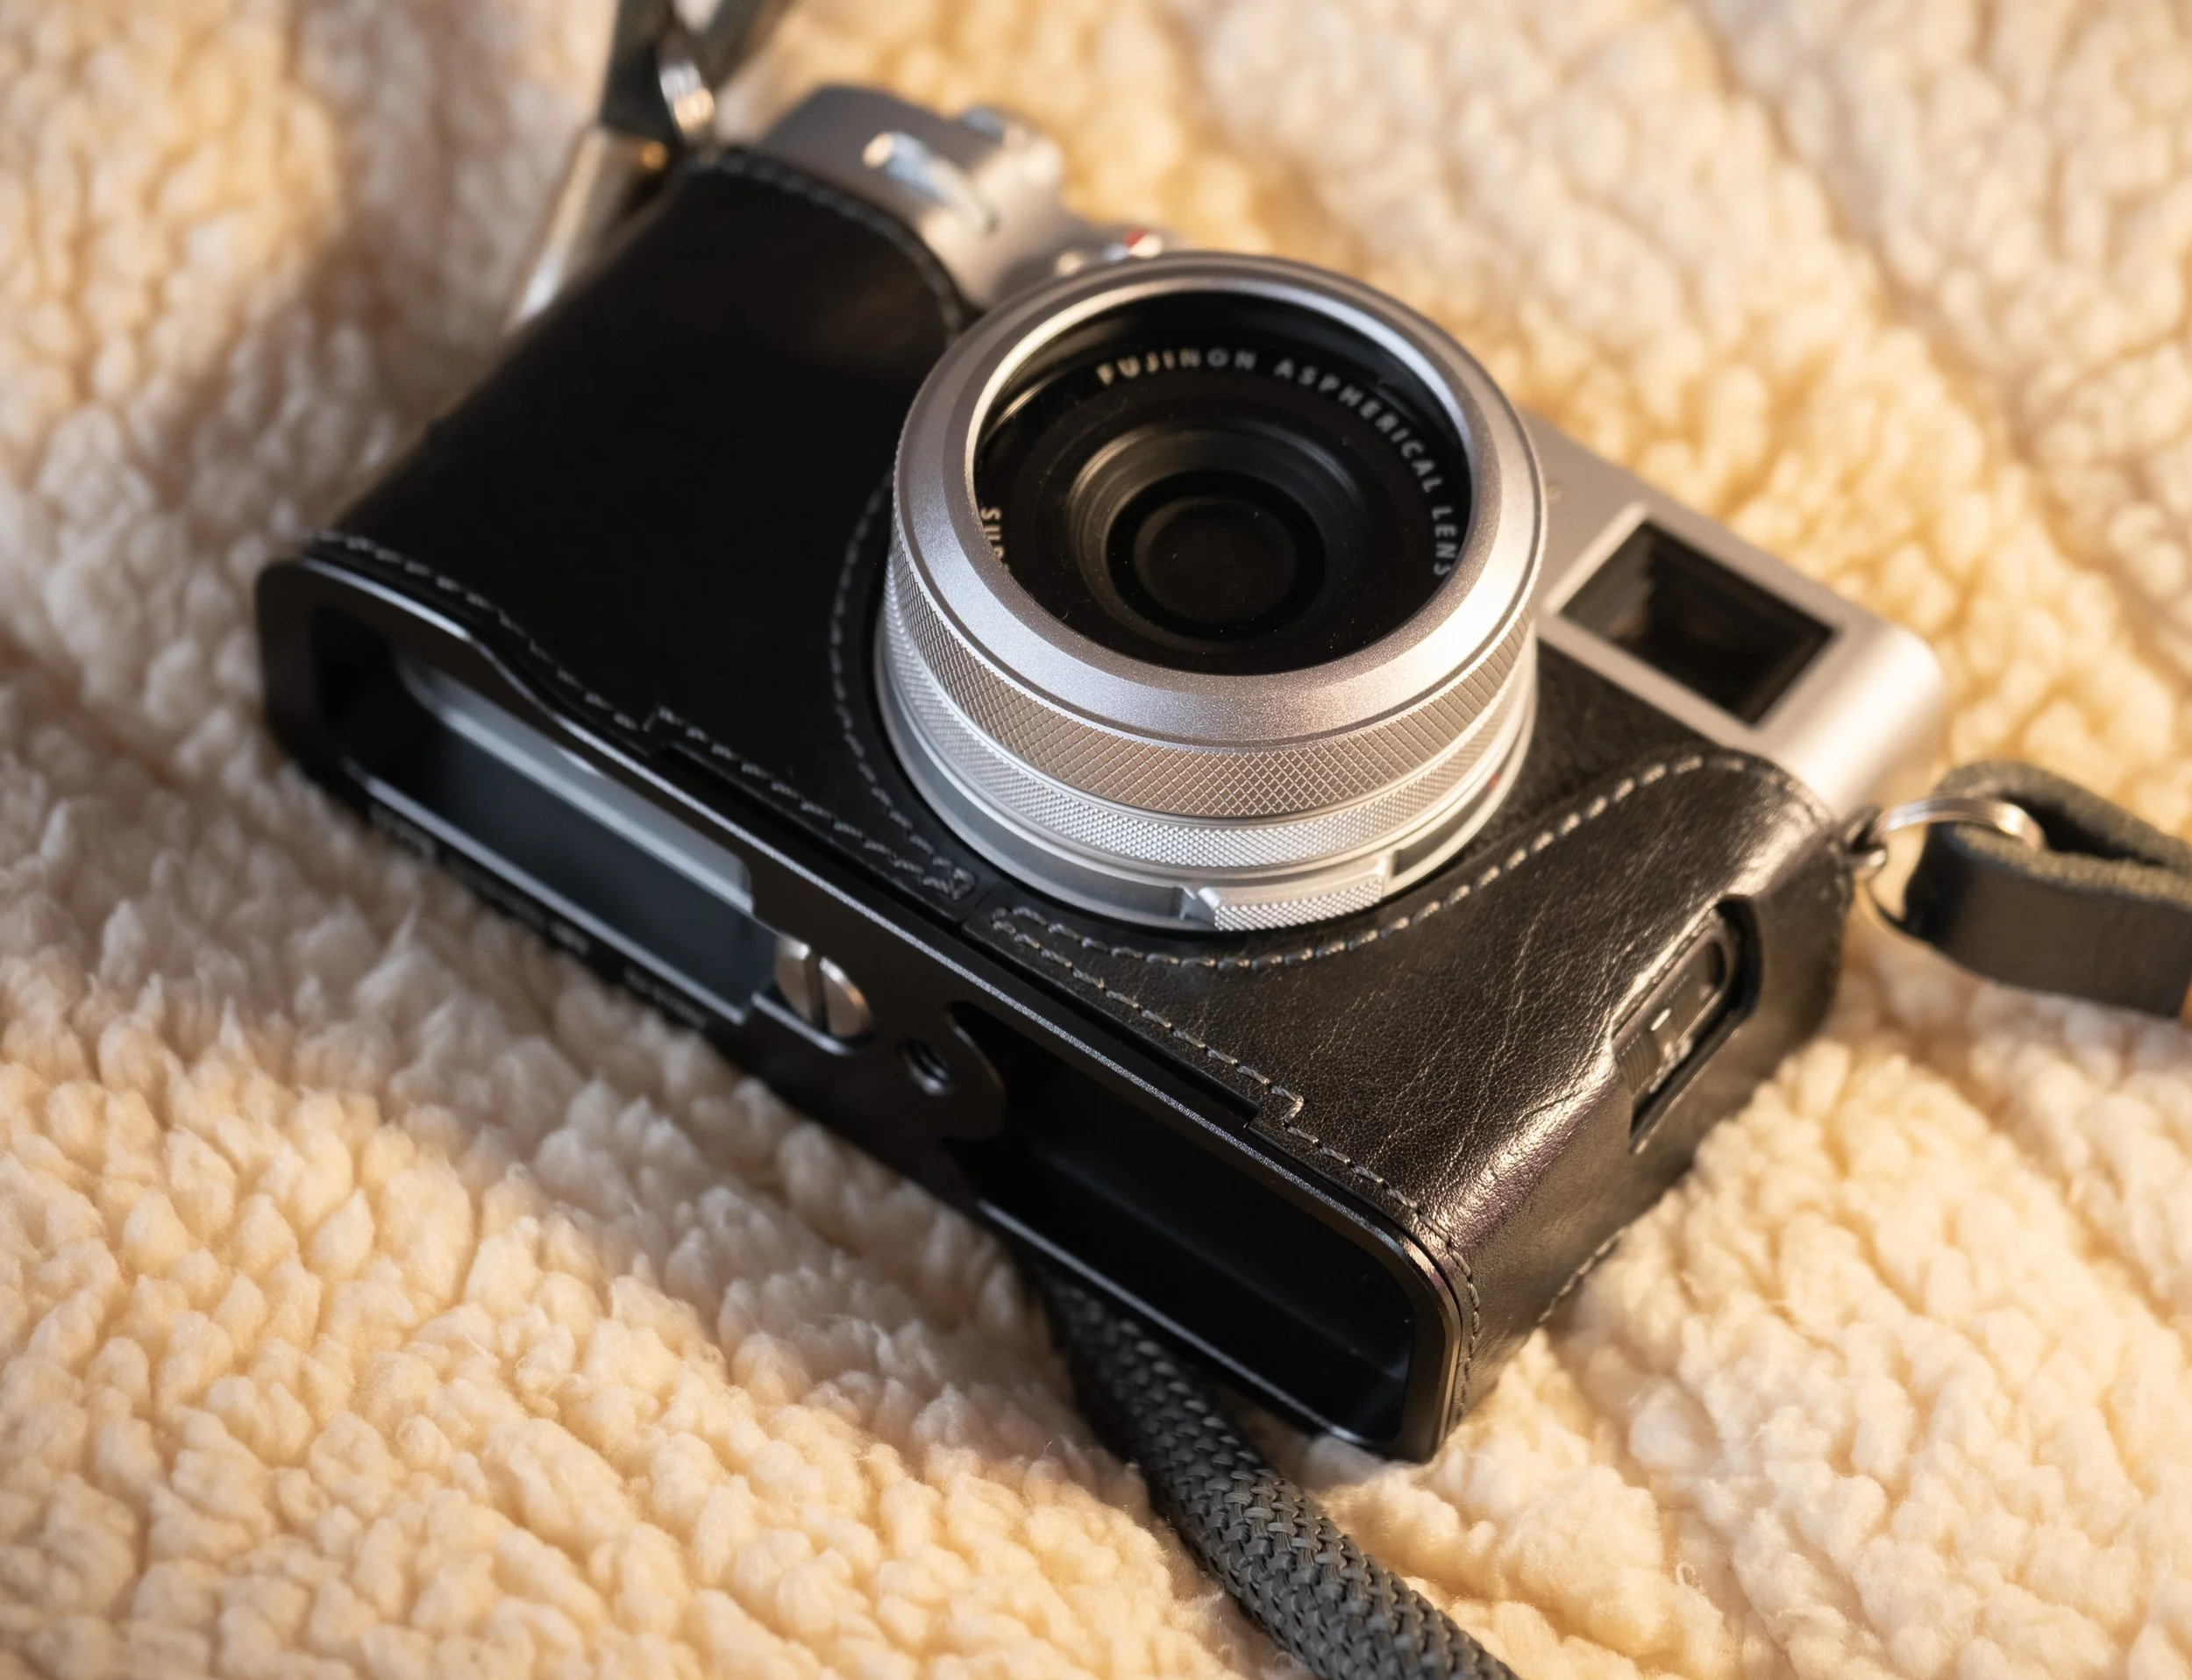
The base plate of X100 cameras, like most, is prone to scratching. I like to use a leather half-case on my camera, which not only protects it, but also adds a little extra grip. This particular case from Lim’s Etsy shop, fits perfectly and has a built-in Arca-Swiss plate for mounting on a tripod which still allows access to the battery and SD card slot.
For that final element of grip and stability, I use an excellent metal hot shoe thumb grip from Haoge. Link: https://amzn.to/4kd1aG9